Motivation and objectives


The results of a first diagnosis for worn turbine components is the basis for decisions in the regeneration process and therefore crucial for the process itself. In order to repair such components the degree of damaging has to be estimated. For that, the current geometrical state as well as microscopic structures and the surface roughness must be known in detail.
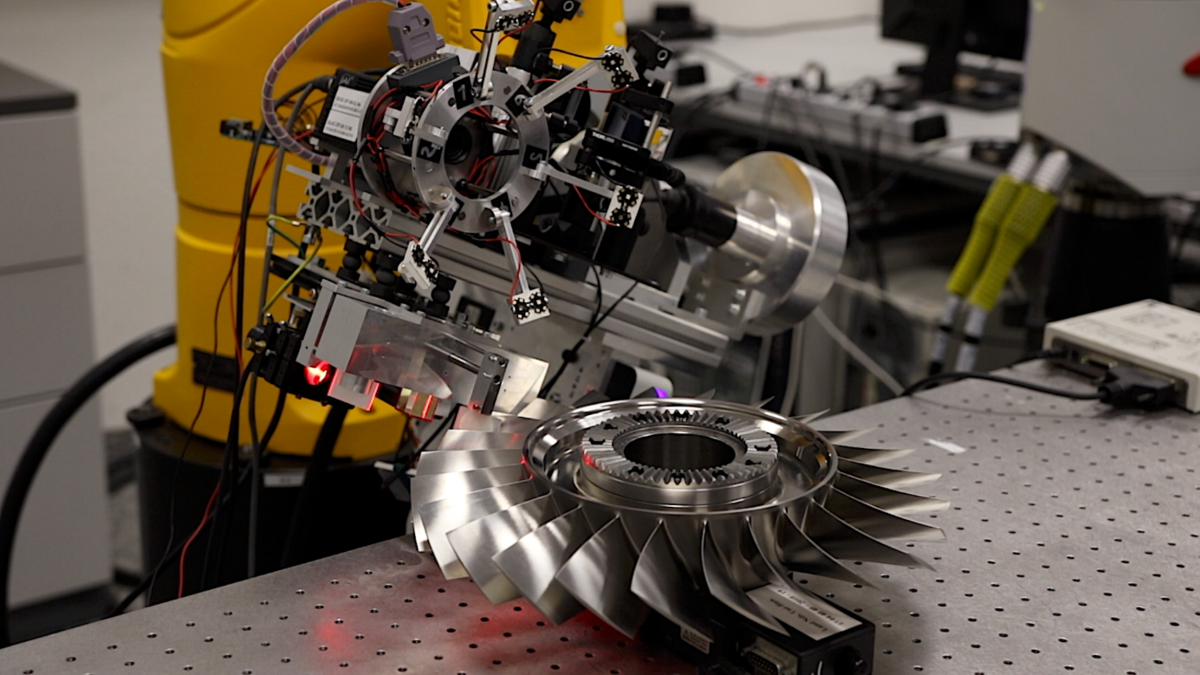
Currently, the decision making of the previously mentioned regeneration processes are based on human visual inspections and experiences. In order to fully automate the regeneration process, a suitable, automated measurement routine has to be developed. Since conventional single-sensor-systems do not offer the possibility to cover the spectrum of required scales, the main objective of sub project A2 was to develop a robot based, non-destructive multiscale sensor system. For an accurate positioning, the measurement system was attached to an industrial robot with six degrees of freedom.
After a successful measurement, the acquired data from all used sensors can be fused into a single dataset, providing a holistic model of the measurement object. That model can then be examined for features like abrasions and damages which are furthermore classified to make a valid assertion about the components current state.
Gathered data is used by other sub-projects to run simulations or plan tool paths for further processing steps.
Please note that activating the video will result in the transfer of data to the respective provider. Further information can be found in our privacy policy.
Play video
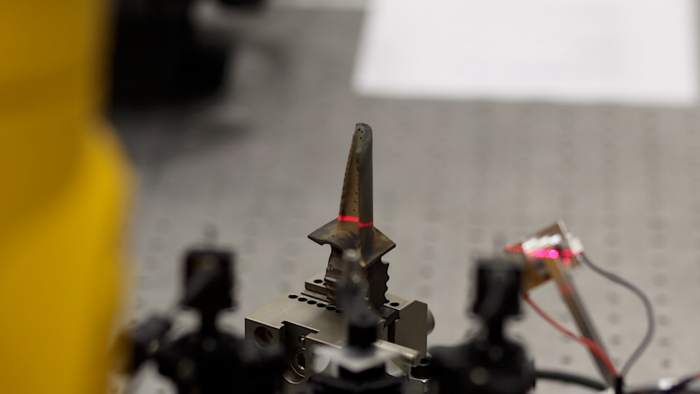
The pose of the robot endeffector with the attached multi sensor system is determined by a high accurate laser tracker, which later connects the individual measurements with each other. Each sensor and its corresponding measurement principle is shown in the following order: Fringeprojection and the resulting stitched 3D-Mesh of a worn turbine blade, the edge sensor with poly-view optics, the BRDF-sensor for an approximation of the bidirectional reflectance distribution function and a measurement of the surface topographies using the low coherence interferometer with an extension arm measuring a turbine blisk.
Results
Within the first funding periods, a variety of sensors for robot based applications were developed. Each sensor was built for a special use case: A fringe projection based system was used for a high resolution macroscopic acquisition of the measurement objects geometry. In order to inspect the edges of complex geometries, a special edge sensor with poly-view-optics was developed. For performance testings based on e.g. computational fluid dynamics, the roughness of a surface can be measured with a Low-Coherence-Interferometer (LCI). For non-geometrical characterization, a sensor was developed, which is able to approximate the bidirectional reflectance distribution function (BRDF) and therefore make an assumption about the surfaces reflection properties to detect damages such as burns. In order to transform the acquired data from different sensors in a single coordinate system, a high resolution laser tracker was used to determine the position of the robots end effector.


Current research and outlook
Current research is focused on the fusion of measurement data of individual modularities. Based on the acquired data, sets of damages are to be detected and classified. The extracted features are then combined to a single data base which will be provided to following sub projects in the regeneration path.
In order to automate the measurement process, another topic of interest is an adaptive, intelligent path planning which leads to the possibility to measure prior unknown geometries. Furthermore intelligent measurement poses are supposed to reduce measurement uncertainties which can occur during the process.
Subproject leader
Staff
30167 Hannover
30167 Hannover
Publications
International Scientific Journal Paper, peer-reviewed
-
(2017): Vibration-insensitive Low Coherence Interferometer (LCI) for the Measurement of Technical Surfaces, Measurement
DOI: 10.1016/j.measurement.2017.03.010 -
(2016): Turbine blade wear and damage – An overview of advanced characterization techniques, Materials Testing 58 (5), S. 389–394
DOI: 10.3139/120.110872 -
(2016): Multiscale measurement of air foils with data fusion of three optical inspection systems, In: CIRP Journal of Manufacturing Science and Technology 2016
DOI: 10.1016/j.cirpj.2016.07.006 -
(2016): Low-coherence interferometry based roughness measurement on turbine blade surfaces using wavelet analysis, In: Optics and Lasers in Engineering 82, S. 113–121
DOI: 10.1016/j.optlaseng.2016.02.011 -
(2015): High-precision surface measurement with an automated multiangle low coherence interferometer, Applied Optics 54 (6), S. 1232
DOI: 10.1364/AO.54.001232
International Conference Paper, peer-reviewed
-
(2018): Near-Wing Multi-Sensor Diagnostics of Jet Engine Components, ASME Turbo Expo 2018: Turbomachinery Technical Conference and Exposition; Oslo, Norway, June 11–15, 2018
DOI: 10.1115/GT2018-76793 -
(2017): Advanced Characterization Techniques for Turbine Blade Wear and Damage, Procedia CIRP Bd. 59: ELSEVIER, S. 83–88
-
(2015): Development of a compact low coherence interferometer based on GPGPU for fast microscopic surface measurement on turbine blades, SPIE Optical Metrology 2015, Proc. SPIE 9525, Optical Measurement Systems for Industrial Inspection IX, 95250R (pp. 95250R-95250R), Munich
DOI: 10.1117/12.2184749 -
(2014): Multiscale Optical Inspection Systems for the Regeneration of Complex Capital Goods, Procedia CIRP. Proceedings of the 3rd International Conference in Through-life Engineering Services, Bd. 22: ELSEVIER, S. 243–248
International Conference Paper, not peer-reviewed
-
(2016): Development of an edge sensor based on polyview optics and laser triangulation principle, In: International Society for Optics and Photonics (Hg.): SPIE/COS Photonics Asia (inproceedings) S. 100231
-
(2015): Compact Optical Sensor for the Measurement of Surface Microtopographies on Turbine Blades, AMA Conference 2015, Proceedings SENSOR 2015, Nürnberg, Germany
DOI: 10.5162/sensor2015/C6.3 -
(2013): Data quality estimation from interdependencies for structural light scanners, Tavares, João Manuel R. S. und Jorge, R. M. Natal (Hg.): Computational vision and medical image processing IV, S. 191–195
-
(2012): Multi-Scale Inspection of Worn Surfaces for Product Regeneration, MSC 2012, New Orleans: Spring 2013, S. 28–32
National Scientific Journal Paper, not peer-reviewed
-
(2011): 3D Messtechnik für Inspektion und In-Situ Überwachung, Ingenieurspiegel, S. 71–72
National Conference Paper, not peer-reviewed
-
(2013): Assessment of used turbine blades on and beneath the surface for product regeneration. Generation of a damage model based on reflection, geometry measurement and thermography, CLEO 2013, 16.5.2013 München
-
(2011): Optimierung eines endoskopischen Streifenprojektionssystems, Spani Molella, Luca Spani (Hg.): Vierter Workshop Optische Technologien. Tagungsband ; 17 - 18 November 2010. Garbsen: PZH, Produktionstechn. Zentrum
Dissertationen
-
(2017): Multiscale and multimodal geometric measurement and data fusion technologies for robot guided surface metrology, Berichte aus dem IMR, PZH Verlag, Garbsen 2017
ISBN: 3959001487


